solar panel blog
Blogs
  • Sizing suitable fuse for PV system
    Sizing suitable fuse for PV system Jul 12, 2022
    INTRO Properly sizing fuses for photovoltaic (PV) systems is critical for the safe, reliable and long-term operation of this renewable power source. Unlike typical electrical power distribution and control applications, fuses in photovoltaic systems are subject to unique conditions. Prolonged exposure to elements of the environment can produce abnormal ambient temperatures, which in turn affects fuse performance, conductor selection and sizing. Also, unlike traditional circuits which are normally sized based on continuous loads, PV modules produce continuous currents,leading to additional considerations when sizing fuses. Taking these conditions into account, a unique method for sizing fuses in PV systems is necessary. WHEN TO FUSE, WHEN NOT TO FUSE   The requirement to protect photovoltaic systems from overcurrent conditions is defined in Article 690.9(A) of the NEC. Fuses are required to protect cables and PV modules from line-line, line-ground and mismatch faults. The sole purpose is to prevent fire and safely open a faulted circuit if an overcurrent event were to occur. However, there are some situations where fusing is not required and is defined by the following: Single Series String (fusing not required) Two Strings in Parallel (fusing not required) Three or More Strings in Parallel (fusing required) Select suitable fuses for parts of the system   Normally, In a complete solar power system, the fuse can be added in between different components, such as from solar panel array to charge controller, controller-battery bank, battery bank-inverter. For each part of units, the fuse requirements can be diverse, the specific ratings depends on how many amperage comes from those units and wires. Solar Panel fusing Normally, those solar panels over 50 watts have 10 gauge wires capable of handling up to 30 amps of current. When you have more than 3 panels connected in parallel, each capable of up to 15 amps, then a short in one panel can draw all 40-60 amps towards that short-circuited panel. This will cause the wires leading to that panel to far exceed 30 amps causing that wire-pair to potentially catch fire. In the case of panels in parallel, a 30-amp fuse is required for each panel. If your panels are smaller than 50 watts, and use only 12 gauge wires, then 20 amp fuses are required. Parallel/Combiner Box fusing In a parallel system a combiner box is used that holds the fuses/breakers to each panel. When sizing this “combined” fuse/breaker, we must first determine the worst case current that will flow based on our specific panels. If we take the example 195 watt 12V panel from the introduction section, and look at the short circuit current (Isc), we see it is rated at 12.23 amps. The National Electrical Code (NEC) also requires that a 25% factor be added if the load is continuous, so the number grows to 15.28 amps per panel. If there are 4 panels in this parallel set, then the combined current can theoretically be as high as 61.15 amps. An 8 AWG wire set (minimum) from the combiner box to the charge controller in our example is enough, since it can handle 60 amps. A 60-amp fuse or breaker should be used in this case to protect this wire set. This also aligns with the maximum capacity of the charge controller selected. Charge controller to Battery Fuse/Breaker With a Pulse Width Modulated (PWN) charge controller, the worst-case amps flowing to and from the controller are the same, so the fuse and wire size can match. As an example, We recommend a 60-amp fuse/breaker for the 60A PWM charge controller, put it between the unit and the battery bank. Battery Fuse/Breaker to Inverter   The wiring and fusing from the battery to an inverter is critical because this is where the most current will flow. Similar to the charge controller case, the recommended wire and fusing should be obtained from the inverter manual. We have already prepared a fuse holder on its positive cable, which is able to hold 50 amps current. A typical 600-watt 12V pure sign wave inverter draws up to 50 amps continuously, in that case, a cable that capable of 55-60A is required, A 6 AWG wire is what you need at least.
  • Charging Guide of ECO-WORTHY Lithium Battery
    Charging Guide of ECO-WORTHY Lithium Battery Jul 12, 2022
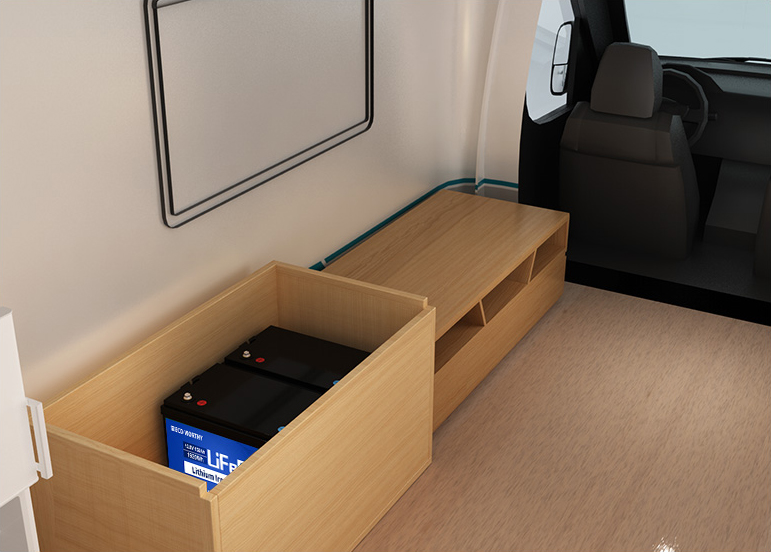
    Charging and discharging batteries is a chemical reaction, but it's claimed that Li-ion is an exception. Li-ion batteries are influenced by numerous features such as over-voltage, Undervoltage, overcharge and discharge current, thermal runaway, and cell voltage imbalance. One of the most significant factors is cell imbalance which varies each cell voltage in the battery pack over time and hence decreases battery capacity rapidly.    How to charge ECO-WORTHY lithium battery You can charge your lithium iron phosphate batteries whenever you want just like your cellphone. Unlike lead-acid batteries, lithium iron phosphate batteries do not get damaged if they are left in a partial state of charge, so you don’t have to stress about getting them charged immediately after use. They also don’t have a memory effect, so you don’t have to drain them completely before charging. There are two methods for battery charging: 1. battery charger(mains power) 2. solar panel (DC power) The most ideal way to charge a LiFePO4 battery is with a lithium iron phosphate battery charger, as it will be programmed with the appropriate voltage limits. Most lead-acid battery chargers will do the job just fine. AGM and GEL charge profiles typically fall within the voltage limits of a lithium iron phosphate battery. Wet lead-acid battery chargers tend to have a higher voltage limit, which may cause the Battery Management System (BMS) to go into protection mode. This won’t harm the battery; however, it may cause fault codes on the charger display.   Li-ion Battery cell level and pack level control variables are needed to be maintained accurately for safe operation. These control variables are monitored and protected by the battery management system (BMS). BMS is an electronic device that acts as a brain of a battery pack, monitors the output, and protects the battery from critical damages. This incorporates monitoring of temperature, voltage, and current, failure forecast or prevention, and data collection through communication protocol for battery parameter analysis. Battery state of charge (SOC) is the percentage of energy currently stored in the battery to the battery nominal capacity. One of the important key functions of BMS is cell balancing. Of course, you can also use a solar panel to charge your ECO-WORTHY LiFePO4 battery, but please make sure to choose a proper controller, both PWM controller and MPPT controller are okay. And as an SLA targeted 12V panel makes about 18V at full-sun full-load, such a 12V panel will provide more than enough voltage under all practical light conditions. If you don't have a controller, you can connect the battery to the solar panel, too. The BMS inside will protect the battery most times.   But if there is a defect in the battery BMS, the battery will be damaged. The ECO-WORTHY Battery Management System (BMS) performs three primary functions: 1. It protects the battery pack from being over-charged (cell voltages going too high) or over-discharged (cell voltages going too low) thereby extending the life of the battery pack. It does this by constantly monitoring every cell in the battery pack and calculating exactly how much current can safely go in (source, charge) and come out (load, discharge) of the battery pack without damaging it. These calculated current limits are then sent to the source (typically a battery charger) and load (motor controller, power inverter, etc), which are responsible for respecting these limits. 2. It calculates the State of Charge (the amount of energy remaining in the battery) by tracking how much energy goes in and out of the battery pack and by monitoring cell voltages. This value can be thought of as a fuel gauge indicating how much battery power is left in the pack.   3. It monitors the health and safety of the battery pack by constantly checking for shorts, loose connections, breakdowns in wire insulation, and weak or defective battery cells that need to be replaced. Unless you like living on the edge, DO NOT BUY a battery without BMS! How to choose an ECO-WORTHY lithium battery charger? Can I charge my lithium battery with a lead-acid charger? Lithium batteries are not like lead-acid and not all battery chargers are the same. A 12V lithium battery fully charged to 100% will hold voltage around 13.3V-13.4V. Its lead-acid cousin will be approx 12.6V-12.7V. A lithium battery at 20% capacity will hold voltage around 13V, its lead-acid cousin will be approx 11.8V at the same capacity. So if you use the lead-acid charger to charge your lithium battery, it may not be fully charged. You can use an AC to DC lead-acid charger powered by mains power, as charge efficiency and duration are less of a concern, it must not have automatic desulfation or equalization modes. If it does, do not use it as there is a high chance of damage to the cells or battery. This can have a significant reduction in battery longevity. If it has a simple bulk/ absorption/ float charge profile, then it can be used to recharge the battery but must be disconnected once charged and not left in trickle charge/maintenance mode. It must also have a maximum output voltage of 13V-14.5V. When it comes to DC-DC chargers and solar controllers, you must change these to LiFePO4 specific models. Our ECO-WORTHY battery charging parameters consist of the following: ✹Bulk/absorb: 14.2V- 14.6V. ✹Float: 14.6V ✹Equalization: 13.6V- 14.0V   But it would be best for you to choose a specific lithium battery charger. We have designed our own battery charger, perfect for lithium, LiFePO4 battery charging. This device connects directly to the battery and is meant for single-battery charging. It’s great for those with trolling motor applications or those with battery systems connected in series. How to use the charger properly? Most LiFePO4 chargers have different charging modes, set them like this: battery type: LiFePO4 battery cells: 4S  C (current): 10A (e.g. 0.3C for 30ah Battery)   Set the charger’s output current to no greater than the ‘0.7C’ rating of the battery. A recommended charging current no greater than 0.5C will help to maximize the lifespan of the LifePO4 battery. Battery bank charging/ Separate charging ECO-WORTHY battery has a voltage limitation on battery BMS module, which allows a maximum of 4 batteries in series connection. And no limitation for parallel. If you charge connected batteries together, it may cause that one battery to be fully charged and the other one not, because the BMS will cut off the current when detecting one high voltage when a single one is full. E.g. 2*30AH batteries are not full when they get to one customer, the capacity and practical voltage varied when they got disposed of in the warehouse, one is 13.2V (70%), the other is 12.9V (20%). The customer got them wired in series, and used a suitable charger to charge them together, after a while, the display revealed full capacity status when it detected one of the batteries got the 13.6V voltage, so the charging process was accomplished, and the charger cut off the current to the pack to avoid over-charging. But actually, the other 12.9V battery was not fully charged after the current got off, so when the customer use the battery bank, he found that the capacity did not reach his expectation, because the total output power gets limited by the low voltage one. So we recommend you get one charging balancer. Or just charge them separately. If you found that the battery bank's total capacity could not reach what it should be after charging the pack to full voltage, you could disconnect the batteries, and test the voltage of each, to verify if some of them did not get fully charged in the process. Can I charge lithium batteries in the cold? Lithium batteries rely on chemical reactions to work, and the cold can slow and even stop those reactions from occurring. Unfortunately, charging them in low temperatures is not as effective as doing so under normal weather conditions because the ions that provide the charge do not move properly in cold weather. There's one hard and fast rule: to prevent irreversible damage to the battery, don't charge them when the temperature falls below freezing (0°C or 32°F) without reducing the charge current. Because the lithium batteries suffer from a phenomenon of lithium metal plating on the anode if charged at high rates in cold temperatures. This could cause an internal short of the battery and a failure.   Please look at the following table to see the relationship between the voltage and temperature. Can I leave the ECO-WORTHY lithium battery on charging all the time? For a lithium battery with a low maintenance charging procedure and battery management system, it's perfectly fine and better than leaving them discharged for a long period. Regardless of whether it is a dedicated charger or a general charger, under normal conditions, it has a charging cut-off voltage, which means that it will stop charging at a certain volt. The same is true for the solar panel controller, and the controller can also be configured like this. The solar panel is directly connected for charging. If there is a problem with the BMS, it may be overcharged. Can I recharge my lithium battery from my vehicle alternator? Yes, but not necessarily to full charge, because most Alternators are adjusted for the lower voltage requirements of the vehicle Lead/Acid Battery (approximately 13.9V). Lithium Batteries require 14.4 to 14.6 Volts to fully charge. That being said, you can get up to approximately a 70% charge, depending on the depth of discharge and distance driven while recharging from your vehicle alternator.   It’s best to use a DC to DC charger, which helps protect and extend the life of your RV battery and not overload your vehicle alternator. Most DC to DC charger models have the same three-stage charging modes, and they will safely charge the battery and prevent alternator damage.  
  • How to Build a Solar Powered Golf Cart
    How to Build a Solar Powered Golf Cart Jul 12, 2022
    Golf carts are heavy, and they are meant to run for hours and miles at a time. They’re electric vehicles that can reach speeds of approximately 15, sometimes 19, or 20 miles per hour depending on the make, model, and year of the cart. They require electricity or gasoline to run. Usually, people use mains power to charge it by plugging in, and it brings an extra payment for the electricity bill. But have you thought of a solar-powered golf cart? Can you Charge a Golf Cart with Solar Power?   A solar-powered golf cart is indeed possible. Such vehicles have been in use for several years and are gaining in popularity. They exist, and they function well. Changing the power source to solar doesn’t diminish a golf cart’s speed or performance. In addition to continued performance power, there are reasons why you should consider a solar panel golf cart.     What Golf Carts can be Powered with Solar? Any golf cart will be powered with solar as long as its battery is solar-rechargeable. A solar panel can charge most batteries (lead-acid, lithium-ion, and AGM), so yes, almost all golf carts can be powered with solar. And aren’t these the batteries we use in a typical solar power system?      Why Consider a Solar Panel Golf Cart  Benefits of a Solar Power Golf Cart Performance Environment Finance Performance Benefits When thinking of building a solar roof on a golf cart, people usually care about the performance of solar-powered golf cart, such as: How well a golf cart can perform when powered by the sun Whether a solar panel kit will get enough power to maintain speed How long does a charge last to charge the battery fully when use solar Solar panel golf carts have as much power as traditional carts because the batteries stay the same. They aren’t slow, they stop and start with as much vigor as high-performing electric or gas carts. The range (both driving distance and running time) of a solar-powered cart is normally better than a traditionally powered golf cart. It’s because the batteries still are charged when driving. A solar-charged cart goes up to five miles farther and has 10 percent more driving time per charge than a cart that has to be plugged for a charge. Using solar power to charge your batteries can avoid low-speed or flameout situations caused by insufficient power while driving, and extends their life significantly. With the sun powering your golf cart, you’d no longer worry about being out on the course too long and having to deal with a dead battery   Likewise, you’d have no more hassles with a normal charger and having to watch to prevent it from overcharging. Environment Benefits   Solar energy is clean. No carbon dioxide is released into the atmosphere as it is when batteries are plugged into the wall to charge. Similarly, no fossil fuels are consumed as they are in gas-powered golf carts. Financial Benefits Of course, you need to prepare a budget if you want to build a solar roof on your present golf cart. But as a long-term valid power, the solar panel usually can work for more than 20 years, consider the electricity bill it saves for you for such a long time, its ROI can be significant.  So generally, adding solar panels to your golf cart is a brilliant idea that’ll allow you to charge it with free solar energy and run it for a long time while reducing maintenance costs significantly. How Many Solar Panels Do You Need? Golf cart’s battery voltage Proper sizing of the solar panels is crucial for this project. Solar panel voltage should match the battery bank voltage for regular charging. Most golf cart batteries are 36V or 48V, this will help you know the size and number of solar panels you need. For example, the available solar panels are 12V, you’ll need 3 for a 36V and 4 for a 48 V solar golf cart battery.   A higher voltage solar panel may work with any charge controller. The roof size of your golf cart It may be possible to size solar panels to fit your club car’s battery, but if the roof doesn’t allow for them, you may need to reconsider. There are generally two ways to add the panels, depending on how big your cart’s roof is: Buy an entire solar roof panel to replace your existing plastic roof, or Buy kits containing solar panels for golf carts to add to the roof you have Normally, a 2-seat golf cart’s roof has space for 1 big panel, 100w if you add it on the roof, 300w if you use it to directly replace the original roof.   A 4-seats cart’s roof can handle about 4-5 pieces of 100w solar panels How to add a Solar Panel to a Golf Cart The golf cart solar kit should come with: The solar panel (s) Extension cable Charge controller Battery connector Here are some simple steps to charge your cart with solar: 1. Put the solar panels on the roof of your golf cart, ensuring that it fits perfectly. Also, make sure to use an extension cable to make the panel cable reach the back of the cart. 2. Use mounting brackets or screws to tie the panel 3. Fix the charge controller on the base floor with some tapes 4. Connect the battery bank to the controller’s battery port with a suitable connector 5. Wire the solar panel extension cable to the controller’s PV port to complete the whole installation Caution: Avoid connecting your golf cart’s battery directly to the solar panel, as doing so may put it at the risk of overcharging and possibly damage. In addition, we've designed an MPPT step-up boost charge controller for the golf cart solar system, which can convert the 12V current from the solar panel to 48V/60V electricity to charge the 48V/60V golf cart battery bank. Reduce the panel's need and make the connection easier Golf cart solar panel kit   Except the step-up charge controller, we now provide a whole solar kit solution, which include solar panel(s), this step-up charge controller, brackets for roof installation and necessary wires. Concerns Added weight Solar roofs and weigh more than your golf cart’s original roof. It’s logical to wonder if the extra weight will slow down your cart. Actually, compared to the total weight of a golf cart (approximately 1100 pounds), the weight of the solar panels (less than 50 pounds) isn’t enough to affect operation. Hardness Fortunately, PV panels are very durable and covered by tempered glass, also known as safety glass. It’s able to bear both snow and heavy rain. Unless a ball hits it at an exact right angle, otherwise, nothing will shatter or break it. Weather condition   Solar panels charge your batteries quickly on a sunny day. While the charging time and productivity won’t be as efficient on a cloudy day as on a sunny one, charging will happen nonetheless, because what the panel needs is just daylight.  
1 2

A total of2pages

leave a message

leave a message
If you are interested in our products and want to know more details,please leave a message here,we will reply you as soon as we can.

Home

Products

skype

whatsApp